Homemade Smoked Maple Bacon

homer_bacon

Homemade bacon.  Got your attention?  Store bought bacon is good, but it’s darn expensive.  Homemade bacon is outstanding, it’s a lot cheaper and not hard to make.

Most ingredients for this homemade bacon recipe are stuff that you probably already have.  The specialty items are:

Pink Curing Salt” is a special salt used for curing meats. It should not be eaten straight up as you will get sick. It’s ONLY for curing meat. You can get that at any spice shop or at Amazon HERE. You only need a little bit for 5 pounds of bacon so it goes a long way.

For pork belly, you may have to shop around. I looked for a while and had butchers want up to $6.00 a pound for pork belly which is just insane (some store bought bacon is cheaper!!). I get mine from a local butcher for $2.50 – $3.00 a pound, which is about right.

Here’s my recipe for homemade smoked maple bacon.

THE CURE
2 ounces kosher salt (about 1/4 cup)
2 teaspoons pink curing salt
1/4 cup maple sugar or packed dark brown sugar
1/4 cup maple syrup (use REAL maple syrup for best results. The “2% maple syrup” fake stuff just doesn’t cut it)
One 5 pound slab pork belly, skin on.

1. Combine the kosher salt, pink salt, and sugar in a bowl and mix so that the ingredients are evenly distributed. Add the maple syrup and stir to combine.

2. Rub the cure mixture over the entire surface of the pork belly. Place skin side down in a 2-gallon Ziploc bag or a glass container just slightly bigger than the meat. The pork will release water into the salt mixture, creating a brine.  You want the meat to be in contact with this liquid throughout the curing process.

* Tip:  If you are doing large pork bellies, use garbage bag size plastic bags (kitchen size unscented garbage bags work great) and just tie them closed. I then put the bag into a baking pan just in case a leak happens when curing in the fridge.

3. Refrigerate, turning the belly and redistributing the cure every day or two for 7 days, until the meat is firm to the touch.  If it feels squishy still, let it cure for another day or two.

4. Remove the belly from the cure, rinse it thoroughly, and pat it dry. Place it on a cooling rack set over a baking sheet and dry in the refrigerator, uncovered, for 12 to 24 hours.  This allows the meat to dry out slightly, making it more receptive to smoking. It will just absorb more smoke, and be more tasty, if you do this.

5. Hot-smoke the pork belly to an internal temperature of 150 degrees F. I typically use apple wood to smoke, but use what you want.  Remove from the smoker or grill and let it cool slightly.

6. When the belly is cool enough to handle but still warm, cut the skin off by sliding a sharp knife between the fat and the skin, leaving as much fat on the bacon as possible (the skin should come off very easily). A slab of pork belly should have equal proportions of meat and fat.

7. Let the bacon cool, then wrap in plastic and refrigerate or freeze it until ready to use.

Yield: 4 pounds smoked, yummy slab bacon.

And in case it’s not obvious, you need to cook the bacon after you smoke it, just like the store bought stuff. The smoking process is for flavor only.

Enjoy! Start doing this and you’ll become a bacon snob like me.

Amazon Deals of the Day

Making your own Mead

Mead?  What the hell is that?

Well, mead is usually called “honey wine”.  It’s an alcoholic beverage made from honey, water and yeast, with some other things thrown in there for flavor.  It’s been made since before recorded history, so it can’t be too bad.  Typically, folks associate mead with pillaging Vikings and such, but mead has been around much longer than that.

The following was taken from: The Story of Mead

THE HISTORY OF MEAD

Our favorite story of mead goes something like this:
A long, long time ago, before the invention of writing and polyester, a lucky human stumbled upon the contents of a beehive. The beehive had been left out in the rain, and the honey inside had fermented. Behold; MEAD!

Mead soon became known as “the nectar of the gods.” King Tut was a satisfied customer, and so were Eric the Red and Queen Elizabeth the First. Enjoyed by paupers, princes, and pirates, mead was possibly the world’s favorite drink.

I have no clue if that’s how mead was first discovered, but alas, it is one of my favorite adult beverages.

Here is probably the simplest and cheapest way to make your first mead, a “JAOM” or Joe’s Ancient Orange Mead, with all of the ingredients bought from Walmart, of all places.

You can make this for $10 a gallon.  Marginal mead at the liquor store is $20 a quart.  Do the math.  You can make exceptional mead, not marginal stuff, for yourself and save a ton of money at the same time.  Get brewing!

I do have to give credit to a few folks who have given me the inspiration to make mead and who have provided many recipes.  They are:

Jack Spirko at The Survival Podcast

Michael Jordan (The Bee Whisperer) at A Bee Friendly Company

Amazon Deals of the Day

Rubbermaid Stock Tank Drain Valve Installation for the Indoor Aquaponics System

Amazon Deals of the Day

When I bought the 100 Gallon Rubbermaid Stock Tank for my aquaponics system, I decided to remove the drain plug and install a valve instead.  This will allow me to attach a garden hose to the tank and drain it out the door of the quail house easily if necessary.

Of course the threads for the drain valve were much larger than a standard garden hose fitting, so I needed a reducer.  I searched around online and had a hard time figuring out what size thread the drain plug was.  So I just took the bulkhead out and brought it to a hardware store and found what fit.

Get a 1 1/4″ x 3/4″ reducer.  That will fit into the bulkhead where the drain plug was.  Then you can simply screw in a valve of your choice.  I chose a boiler valve since it’s short and won’t stick out too far where I’d trip over it.

Here’s how to install it.

Amazon Deals of the Day

Lighting for the Indoor Aquaponics System

Amazon Deals of the Day

LIGHTING
Growing plants indoors means you will need to provide them some artificial lighting.

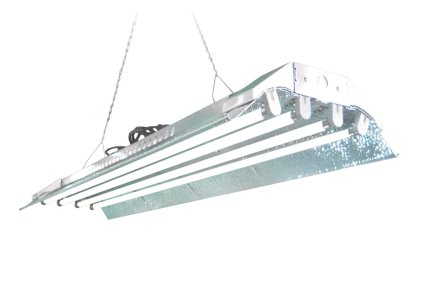
For my set-up for now, I have one 4 foot long DuroLux T-5 florescent light fixture hanging.  This is more than enough for a 3 foot x 4 foot grow bed.

T5 Grow Light

This fixture came with four T5 bulbs, chains to hang it, an on/off switch that toggles so you can have 2 or 4 bulbs lit, and a nice, long power cord.  It produces 20,000 lumens.  It also has an outlet on the housing so you can plug another light into it and daisy chain them together, which is handy because you’ll have these on a timer.  Overall, I found this to the best value and it has a 4 Star rating.  It’s $81.99 with Free Amazon Prime Shipping.

The bulbs it came with are 6,500 Kelvin which means they are the right light spectrum for vegetative grown.   The 6,500 Kelvin spectrum basically mimics sunlight during daytime hours and has a slight bluish hue to it.  Leafy greens like lettuce, basil and green onions thrive under these lamps.

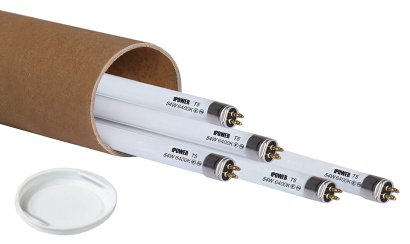
I also bought a 5-pack of spare bulbs for when one inevitably burns out.  Again I went with what seemed like the best value and had at least a 4 Star rating:  iPower T5 6400K Grow Light Bulbs, 5-Pack.  These are 6,400 Kelvin bulbs – basically the same thing as the bulbs that came with the DuroLux unit.  They’re rated to last 10,000 hours, so I think I’ll be good on bulbs for a while.  The 5-pack is $22.54 with Free Amazon Prime Shipping.

T5 Bulbs

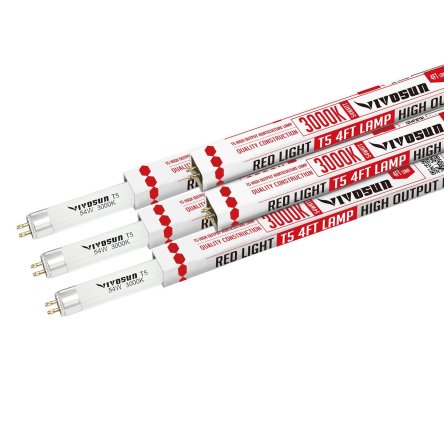
If you want to grow fruiting veggies like tomatoes or peppers, you’ll want to get bulbs in the 3,000 Kelvin spectrum, like these:  Vivosun 3000K T5 Grow Light Bulbs, 5-Pack.  The 3,000 Kelvin spectrum is a warmer, redder light that promotes fruiting and budding.  $22.95 with Free Amazon Prime Shipping.

Vivosun 3000K

Since I have 2 of the 21 gallon mixing tray beds, I plan on getting another DuroLux fixture so each bed has their own:  one bed for leafy greens and one for fruiting veggies.

Amazon Deals of the Day


Humidity Control in the Indoor Aquaponics Grow Space

Amazon Deals of the Day

HUMIDITY
When I built this thing, I knew that I would have to come up with something to deal with the humidity in the room.  With just the quail in there I’d get frost on the windows when it got cold.  Add a 100 gallon tank of warm water….yeah, humidity.

There are two windows and a big sliding glass door in the quail house, so they get all wet from dew building up on them.  Wet wood is a long term problem so this needed to be addressed right away.

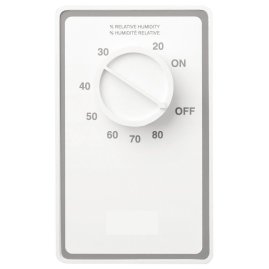
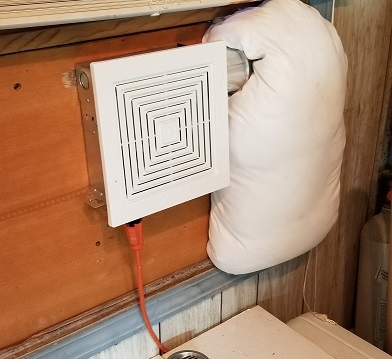
My solution was to install a vent fan (like a bathroom ceiling fan) in one of the windows and connect that to a dehumidistat.  I got the vent fan at an Ace Hardware store for about $18.  The dehumidistat turns the fan on if the humidity in the room is too high and turns it off when it’s low enough.  You can adjust the humidity level just like you do with your thermostat for temperature in your house – just turn the dial.  Very cool, and it works great.  Easy to install too and it came with great instructions.

I got a Broan-NuTone DH100W Dehumidistat to do the job, and it’s doing it well.  4 Star rating and $15.99 with Free Prime Shipping (it was $25 at Home Depot).

Broan Dehumidistat

Here you can see my sophisticated venting solution, LOL.  I just took some scrap wood and screwed the vent fan to it. Then I routed the vent out of the window and filled the gap with an old pillow.  I will fabricate a more elegant installation and insulate the plywood eventually.

vent 2

We had a week or so of below zero temps here and I had practically no dew build up – just a little in a few corners of a window.  We get that in the house sometimes when it’s really cold so I call that a win.

I have the unit set at 50% humidity right now.  In the summer months I’ll bump that up or even turn it off completely when I can have the windows open.

Amazon Deals of the Day

Heating for the Indoor Aquaponics System

Amazon Deals of the Day

HEAT
Obviously, seedlings and plants need to be kept warm.

In the quail house I have a small space heater set to be on for a half hour, then off for an hour.  This keeps the temperature between 60F and 70F most of the time.  (To be clear, this is for the plants, not the quail – the birds do just fine in cold temperatures).  When it gets wicked cold, I just let the heater rip and keep everybody happy.  I’m looking into some other heating options, but this is the obvious solution for now.

Please comment if you have any  solutions to keeping a small space  warm!

I was a bit concerned about our electric bill with the heater running, plus the grow light and the fish tank heater.  But after a full month, our bill only went up about $10.00.  And that was with the week of blistering cold and the heater running for a few days straight.  I cut more than $10.00 worth of basil out the beds in that month, so no complaints.

Amazon Deals of the Day

Indoor Aquaponics Update

Amazon Deals of the Day

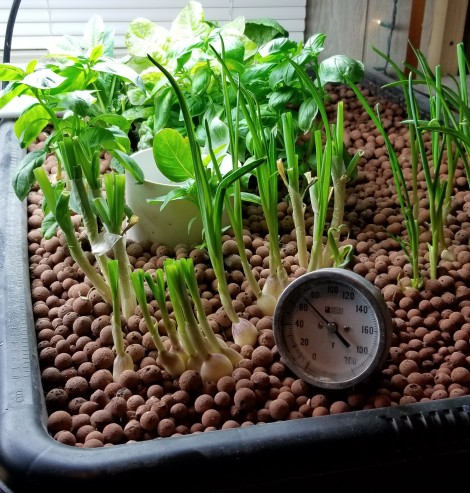
I’ve had this aquaponics system working in my quail house for a while now and it’s working out quite well.  I have basil, green onion, lettuce and garlic growing like crazy now in the ebb and flow bed.

bed 2.26

I started a wicking bed and planted a bunch of seeds:  bok choy, tomato, lettuce, cabbage, broccoli, carrot, onion, pea and basil.  The bok choy, lettuce and broccoli went totally nuts sprouting right away. I’ll definitely have to thin the herd there eventually. The cabbage is going awesome now. Yesterday the carrots and onions sprouted, and there are lots of sprouts. I only got 3 tomato and 1 bell pepper sprouts, but I have more seeds so they’ll go in soon. 3 of the 4 pea seeds sprouted also.

Some new videos will be coming soon, showing you how things are set up and the progress with growing stuff.

I’m doing all of this in the Colorado mountains in the dead of winter.  We have had several days of below zero temperatures here in February and I have seeds sprouting – so cool!

Amazon Deals of the Day


Indoor Aquaponics in the Bird House!

Amazon Deals of the Day

Veggies and Fish are Growing in the Quail House!

I’m building an aquaponics system in the bird house.  Here’s the progress so far.

Here’s some of the equipment that I’m using that you can get from Amazon. All have 4 Star customer reviews or better, and all ship free with Amazon Prime.

Rubbermaid 100 Gallon Stock Tank  $155.00
Practically indestructible and the perfect size for my system.  If you have a Tractor Supply near you, you can get these there much cheaper than at Amazon.  I added the link so you can see the description, dimensions, etc.

DuroLux T5 High Output Grow Light (4ft 4 lamps) $81.99
20,000 Lumens.  It comes with four 6500K bulbs.  See my post on Lighting for the Indoor Aquaponics System

Eheim Jager 250W TruTemp Submersible Heater 17” $37.48
This tank heater is good for tanks up to 265 gallons. Eheim Jager has a great reputation.

Active Aqua Submersible Water Pump, 1000 GPH $51.99
I decided to go with a bit more pump than I need right now since I may expand the system in the future. Better to have more pump than you need than not enough.

API MASTER TEST KIT (Aquarium Water Test Kit) $21.99
Excellent test kit. I’ll be able to use this for years before needing to replace any of the chemicals.

CPR Aquatic 4 Count Slip by Slip ABS Bulkheads for Aquarium Filters, 1-Inch $14.47
Four 1-inch bulkheads for less than $15 is a great deal. Similar bulkheads go for $8.00 EACH at Tractor Supply. 2 inch PVC pipe fits snugly over the top of these making them perfect for standpipes.

Just about everything else for the system I got at Home Depot, Lowes or Ace Hardware.

Amazon Deals of the Day

Sriracha Honey Glazed Quail

Amazon Deals of the Day

With a freezer full of quail I am always looking for new recipes to keep things interesting.  My dad emailed this recipe to me and it is now our favorite.  I didn’t take any pictures when I made it for the first time, but I will update this post with some the next time we make it (it won’t be long).  I just wanted to get this recipe out there asap!

I modified the recipe somewhat – recipes are only guides after all.  Modify them to your taste.

Fried Quail

6 quail
1 cup (237 ml) Sriracha sauce
1 cup (237 ml) buttermilk
Frying oil
1 cup (237 ml) high alcohol beer
1 egg
2 cups flour
Salt

Take the 6 quail and remove the breasts and “drumsticks” (thigh and leg).

Mix the Sriracha and buttermilk and marinate the quail for several hours or overnight.

Preheat your frying oil to 325°F (163°C).  A deep fryer or a big pot will work fine.

Mix the beer and the egg in a mixing bowl. Place the flour in a large shallow dish or bowl.

Remove the quail from the marinade, rinse under cold water and season with salt.

Dip the quail in the egg mixture and dredge in the flour.

Fry at 325°F (163°C) for 5–6 minutes, or until golden brown, and drain on paper towels.

And now for the really good part……

Sriracha-Honey Glaze

¼ cup (59 ml) Sriracha sauce
½ cup (118 ml) honey

Mix the Sriracha and honey in a large bowl. Toss the fried quail in the Sriracha-honey sauce and serve immediately.

Our kids devoured the “drumsticks” and the adults loved the boneless breasts.  This became an instant favorite.

Amazon Deals of the Day